


DIY Window Film Installation Guide
Tint your windows yourself
It is not difficult to install tinted film for your home. You can easily do it yourself. Have a little confidence and dive right into it. We are here to provide guidance and steps so that you can do it yourself at home! Follow the step-by-step window film installation tutorial below or watch the videos via the links at the end of this tutorial.
Window Film:
- Purchase your window film from any nearby window film supplier or tint shop. You can buy online as well, as it is normally cheaper. Visit www.tintedfilm.com.my for a wide range of window films. We have a wide range of variety suitable for automobiles, residential homes and office buildings.
Tools:
- Spray bottle (fill it with cleaning solution and cold water) Caution: use only non-acidic solutions
- Sharp retractable knife
- Measuring tape
- Trim guide or plastic cards (similar to credit cards)
- A clean and dry towel / cloth (lint free)
- Squeegee
- Scraper (for cleaning glass)
Get all your require tools at www.tintedfilm.com.my/tools
Tip: Tinted films are normally installed on the interior surface. You may choose to install on the exterior surface, but be prepared for rapid film degradation.
Installation Guide:
Step 1: Measure the window/glass:
Measure your window height and width.
Step 2: Cut the film:
Cut the window film about 1” larger than the size of your window. E.g: If your window dimensions are 30″ x 40″, cut the film to 31″ x 41″.
Step 3: Ensure your window/glass is clean:
Spray the soap cleaning solution onto the window and clean it using the scraper. Ensure that the scraper and window remain wet to prevent scratches/tugging on the glass. Pay special attention to the edges of the window. Avoid getting too much solution onto the frame to minimize dirt and other foreign matter from sticking onto the glass. Spray the window again and slowly scrape and remove all water from the glass using squeegee. Now, use a dry and clean towel around the edges of the window to ensure dirty water does not contaminate the film during installation.
Step 4: Prepare the film:
Thoroughly spray the solution onto the application surface of the window. The solution acts as a lubricant for the film and reduces friction. Remove the release liner or film backing from the film and thoroughly spray the adhesive side of the film. This procedure reduces any static electricity caused by the liner removal, lessens contamination, and prevents the film from adhering to itself.
The liner can remove by attaching two pieces of sticky tape at one corner of both surfaces of the film. Press the two pieces of tape firmly together, and then pull them apart to help start the liner removal process. Wet your hands with the solution before handling the film to avoid leaving any fingerprints on the adhesive.
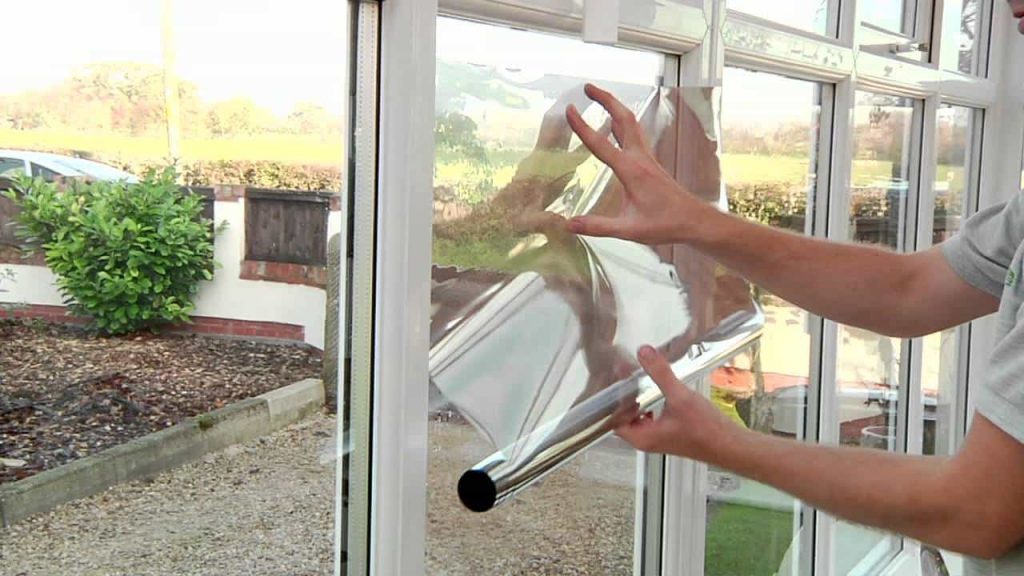
Step 5: Apply the film:
Keeping both the film and window wet, place the adhesive side of the film onto the glass. Start at the left and right top, and then allow the film to gently adhere onto the glass. You will still be able to slide the film around and position it correctly as long as the window and film are thoroughly wet.
Spray the entire non-adhesive surface of the film facing you with the soapy solution to prevent squeegee drag. Using the squeegee, remove as much water or soapy solution as possible. To do this, first squeegee horizontally across 2” from the top to set the film. Second, from the center, squeegee downwards vertically. Continue to squeegee horizontally from the center to the edges, pushing the water or soapy solution out from under the film. Overlap the squeegee strokes to maximize water removal.
Step 6: Trim or cut the film:
Run a trim guide or plastic card along the edge of the film to momentarily set the film against the glass and frame. Place the retractable knife between the trim guide and the edge to begin trimming. Always ensure that the blade on the retractable knife is sharp. After trimming, squeegee the film once more following the same techniques as the previous step.
Step 7: Dry the edges and finish
Wrap the trim guide or plastic card with a soft, lint free cloth. Lightly wipe down or gently blot the edges to remove excess water. Leave the film to completely cure. Curing time will vary depending on the type of film, effectiveness of water removal and numerous other factors. Avoid using any abrasive material for cleaning as it will scratch or damage the film.
If air pockets appear or remain, rewet the surface of the film facing you and squeegee again.
Leave it to dry for at least 72 hours.
You are done!
You may watch these videos for a clearer understanding:
 Rainbow Films
 Bundle Sales